Aorus Z270X Gaming 5 Motherboard Review
Author: Dennis GarciaBenchmarks - Overclocked
One of the unique things in our reviews is the overclocking aspect where we pit the default speed system against the overclocked one in a head-to-head byte match. The effective overclock for these tests is 5.25Ghz @ 50x multiplier and 105 BLCK. The CPU will clock up to 4.8Ghz on air without much more than a voltage bump so it was time to push things and go cold.
For these tests i used my Single Stage Phase Chiller and brought the CPU temp down to around -30c and started clocking the CPU up.
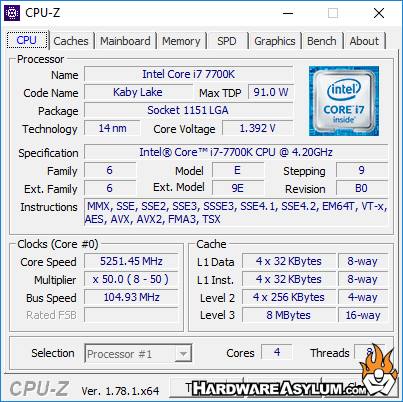
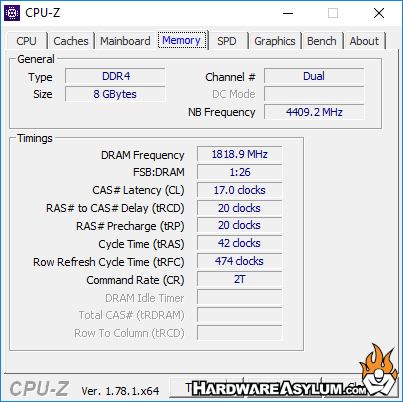
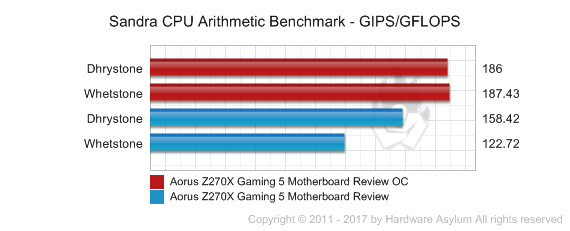
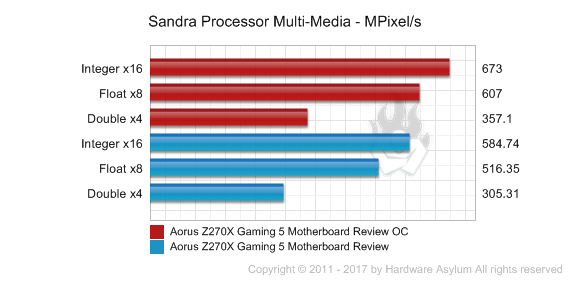
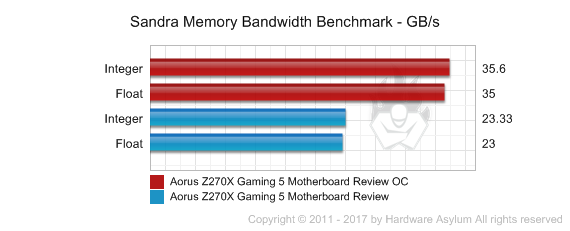


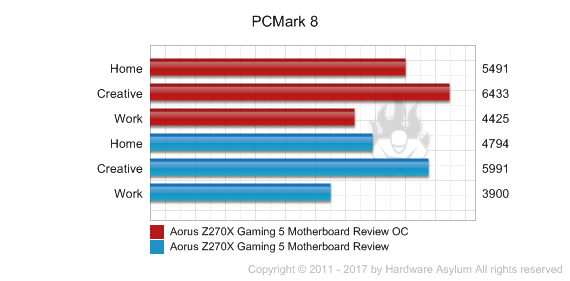
When overclocking it is important to find a "sweet spot" where the performance curve tops out and still remains stable with a reasonable amount of heat production. For this test I didn’t pay much attention to heat output but rather stability with the least amount of CPU voltage. Of course when you get into doing extreme overclocking you’ll find that the Voltage/Frequency curve tends to climb in a logarithmic scale and it starts around 5Ghz on the Core i7 7700k so "least amount of voltage" is a bit of a misnomer.
The reason for going cold is twofold. First is related to issues with the TIM under the heatspreader which doesn’t always transfer heat the why you would expect. As a result the CPU die always reads hotter than it should. For instance the heatspreader might read -36c while the CPU is cooking at +30c.
Second, CPUs and GPUs tend to run more efficient when they are cold allowing you to get a few more MHz from the chip without needing any extra voltage. Basically that logarithmic scale tends to shift to the right. You will still need to feed it voltage to scale and are limited to how much heat you can pull from the chip.
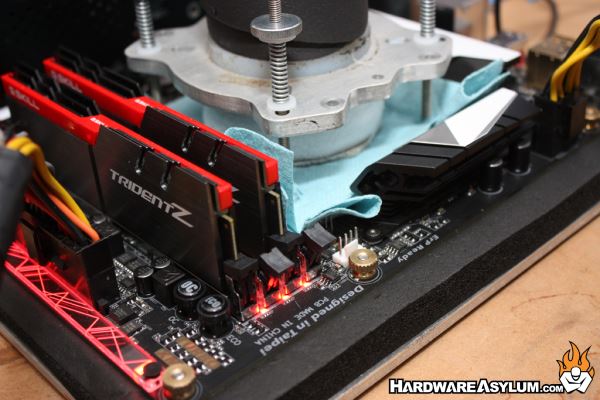
Overclocking the Aorus Z270X Gaming 5 was pretty straight forward and can be done in a variety of ways. For those familiar with the Gigabyte UEFI you can manually set frequencies and voltage or you can select any number of "auto up" options or even use the onboard OC button. Clicking that will ramp the Core i7 speed up to 4.7Ghz. The important thing to note when overclocking anything is to "know your processor" which is code for, take it slow and map out what you need to adjust to attain the different frequencies.
For these tests I was being a little ambitious and was trying for 5.7Ghz. Given that 4.7Ghz was attainable without voltage it stands to reason that the processor should be able to run that fast. In fact it would boot to 5.6Ghz but wasn’t stable. 5.5Ghz acted like it wanted to run but would crash at random times with a random code. In the end I settled on 5.25Ghz and was very impressed with how well the system ran while still being a little disappointed that the scores were not much better. Bottom line this processor clocked similar to Skylake and that is all you can expect.

