Noctua NH-D15 G2 HBC Heatsink Review
Author: Dennis GarciaNoctua NH-D15 G2 HBC Installation
The NH-D15 G2 supports a variety of different processors and is a standard recommendation for the modern CPU. An offset mounting makes it perfect for AM5 systems and the included NM-ISW1 shim washers help to reduce contact pressure when used on the LGA 1700. The HBC variation has all of the same features but comes with a cold plate design specifically for LGA 1700 and similar processors which have been deformed due to high ILM pressures.
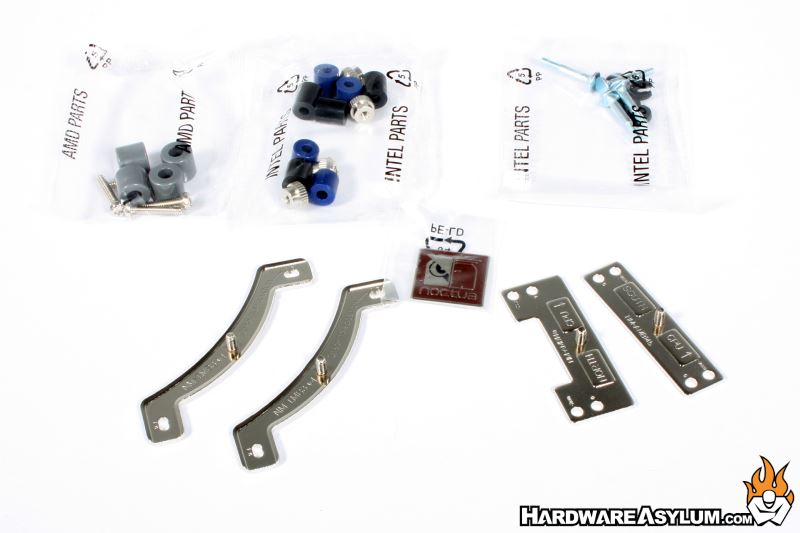
The first step will be to locate and install the included backplate and supporting hardware. Unlike on older designs you will need to assemble the backplate and configure it for your system given the difference between LGA1200 and LGA1700.
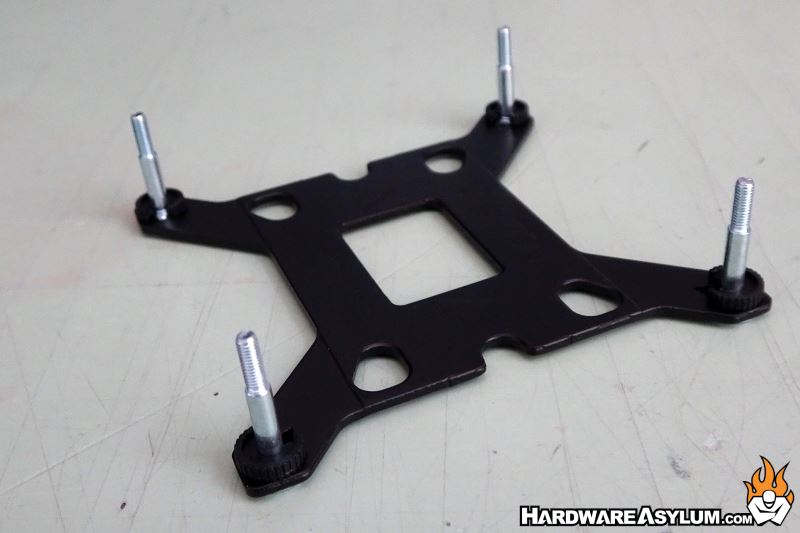

To assemble the backplate, align the pins and secure them in place using the included plastic “C” clips. LGA1200 will have the pins aligned towards the center of the backplate, while LGA1700 will have the pins towards the outside.
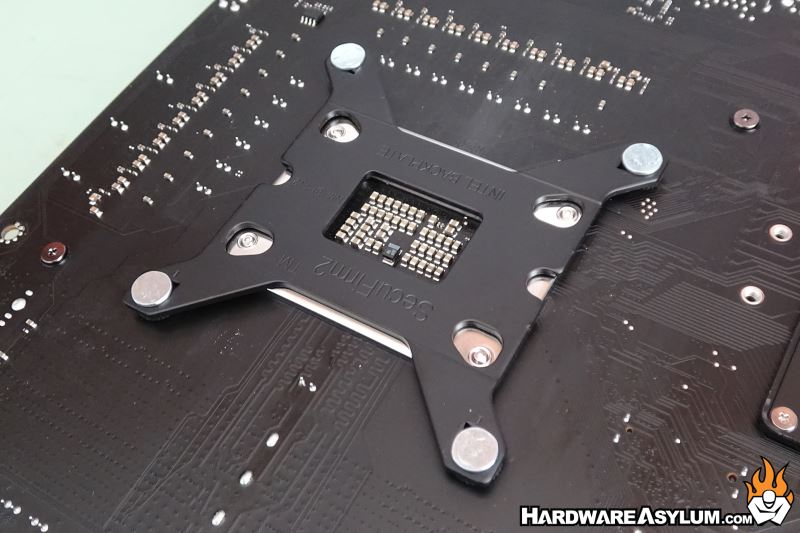
You will need to align the holes with the bolts on the CPU socket and then flip the motherboard over.
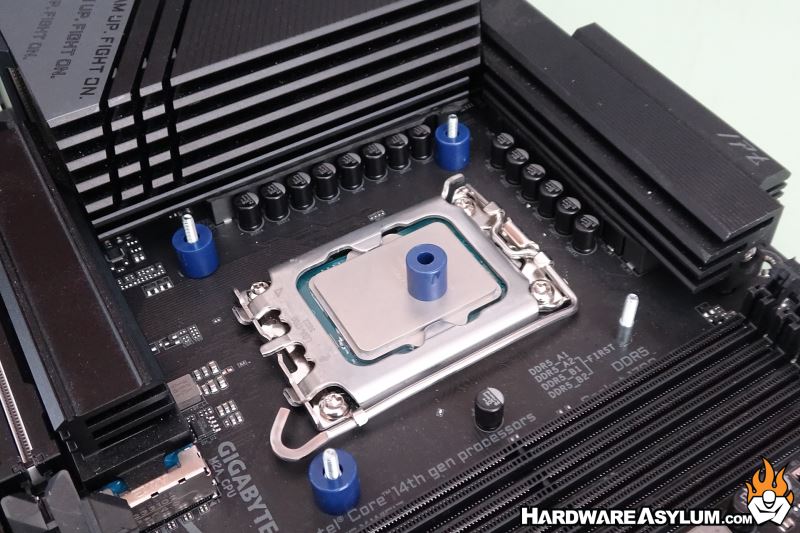
Next locate the plastic spacers and slide them over the four posts from the backplate, Pay special attention to the color. LGA1200 spacers are black while LGA1700 will be blue. The difference will alter the finished height of the mounting rails and could either prevent contact with your CPU or provide too much mounting pressure.
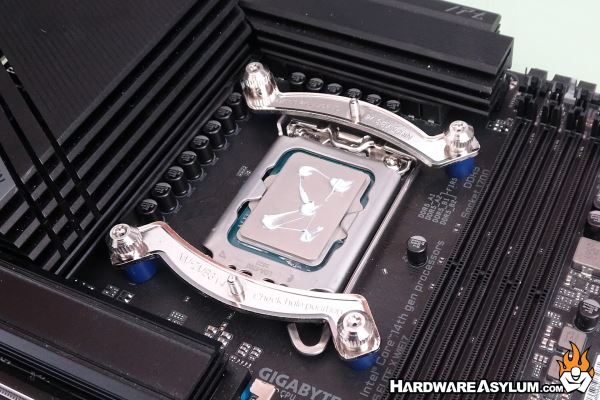
All systems will require installing the mounting rails. These are directional so consult the manual for the proper orientation for your system. On LGA 1200 they are positioned with the bow outward. It should be noted that the threaded posts will align perpendicular to the fan and will indicate the direction of airflow and how the tower will be oriented.
There are four capped bolts that secure the rails to the backplate mounting posts. These do not need to be excessively tight, just snug and, you can do this with your fingers. (or a screwdriver)
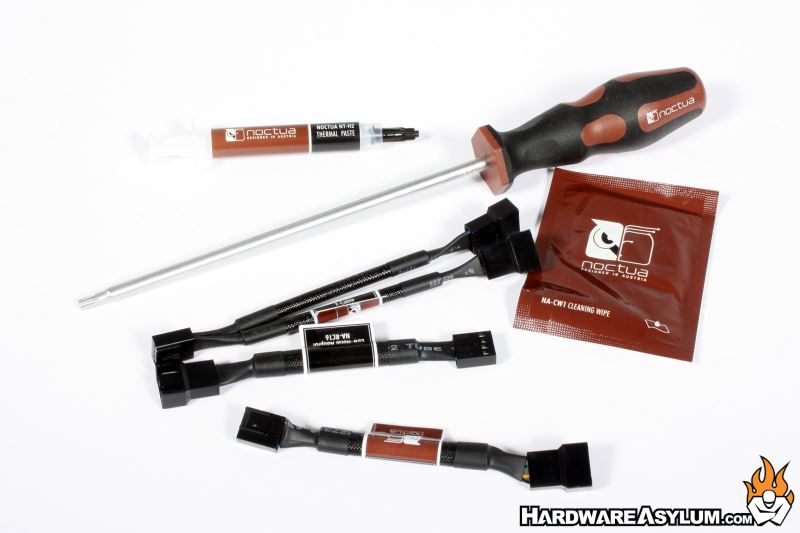
At this point I like to install the thermal compound. I prefer the 5-dot method, simply dab five small blobs of paste in the pattern pictured and you are set. For this review I’ll be using the Noctua NT-H2.
The next to last step is to install the cooler. It is common for Noctua coolers to be slightly offset and the larger tower will be positioned opposite of the memory modules. This will provide full memory access while still clearing any VRM heatsinks that are installed. Place the cooler over the threaded posts and progressively tighten the spring screws until they bottom out. I would suggest single turns per screw in an alternating pattern.

Finally install the fan and will lock to the cooler using the hooks along the edge. Just make sure to correctly align the airflow. A good rule of thumb is that air will always flow towards the motor, aka the part of the fan that holds the motor to the frame. Then make sure you are blowing air through the thicker tower, which should be pointed towards the rear of the case.
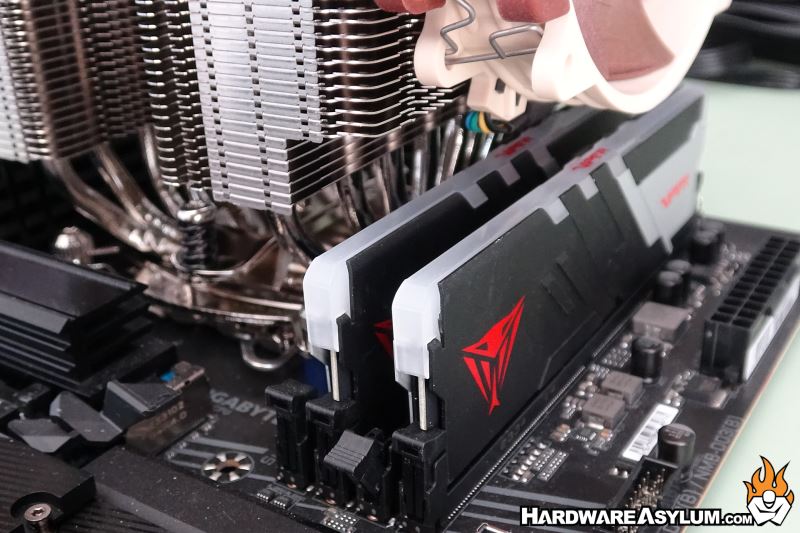
Dual tower coolers like the HH-D15 can be quite large and while there are cut-outs for memory access, I did run into clearance issues when using the Patriot Viper DDR5 modules shown here. The solution was to simply install the fan upwards to clear the modules. Had this not worked, I would have removed the fan.